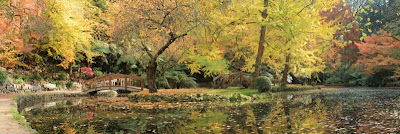
If you want to instill in yourself a sense of peace and tranquility then nothing does it better than a lush green garden or parkland setting. Being in such an environment can really make you feel at one with nature.
It is a known fact that the colour green conveys a feeling of relaxation. It not only soothes the eyes and calms the mind but also people who are surrounded by a green environment experience fewer days of sickness.
Apart from creating your own garden oasis in your backyard the next best thing to do is to try and capture some of this relaxing ambience in your own photographs. Doing so can be a bit tricky, but with some helpful hints and pointers you can soon be decorating your home and/or office with a range of garden photos which will keep you stress free and relaxed more often.
- Level your Tripod - Always use a tripod and make sure that it is level so that the horizon is straight. You can fix this later in a photo editing program but it is easier to get it right in the first place to save extra work.
- Have the Sun Behind You - Always try and have the sun behind you when you take a garden photo so that you get the best colors and lots of light on your subjects.
- Mix the Foreground & Background - Create you photo with a mix of attractive foreground objects and background areas.
- Choose a Subject - Choose a prominent subject for the garden photo and place it either in the foreground or middle section of the photo.
- Leave Room for Cropping - When looking at the composition of the photo in the viewfinder ensure that there is some room at the edges from cropping of the final image.
- Use Filters - To remove reflections from water or metal objects use a polarizing filter, whilst if your photo has a lot of sky in it use a graduated neutral density filter to get the sky going from light blue at the horizon to really dark blue higher up.
(Note that this effect can be replicated on a computer if you can't or don't want to use filters - Trev) - Cover All Exposure Bases - When choosing your exposure levels make sure that you don't get it wrong by taking 2 or 3 photos at different exposure levels, usually + and - 2 f/stops. This is known as "bracketing."
- Use a Remote or Self-Timer - Always use a remote control or self-timer when taking photos to ensure that there's no camera shake caused by you.
- Invest in Your Lenses - To get the best results from your DSLR camera buy a really good quality lens. They will be expensive but your photos will definitely be of a much better quality.
- Shoot in the Morning or Evening - If possible take the photo in the early morning or late evening as these times generally produce the softest light and give the best results.
By making the most of all the above tips you will see a marked improvement in photos that you take of gardens and parks. Your garden photos will not only show more detailed subject definition but will also produce vivid green colours. Now is the time to go out there and try it for yourself.


No comments:
Post a Comment